
You’ve seen those perfectly styled shelves on Pinterest—you know the ones. Every object looks intentionally placed, there’s a perfect balance of function and beauty, and somehow it all just works together. Meanwhile, your shelves look cluttered, chaotic, or worse… boring.
Here’s the secret professional stylists use: it’s not about having the perfect items or spending a fortune on decor. It’s about understanding the 3-Layer Styling Method—a simple formula that works every single time, on any shelf, in any room.
Once you learn this technique, you’ll never look at your shelves the same way. You’ll have a foolproof system for creating that “effortlessly curated” look that makes guests ask, “Did you hire a designer?”

Understanding The 3 Layers (Your Foundation)
Before we dive into the how-to, you need to understand what the three layers actually are. This framework is the backbone of professional shelf styling.
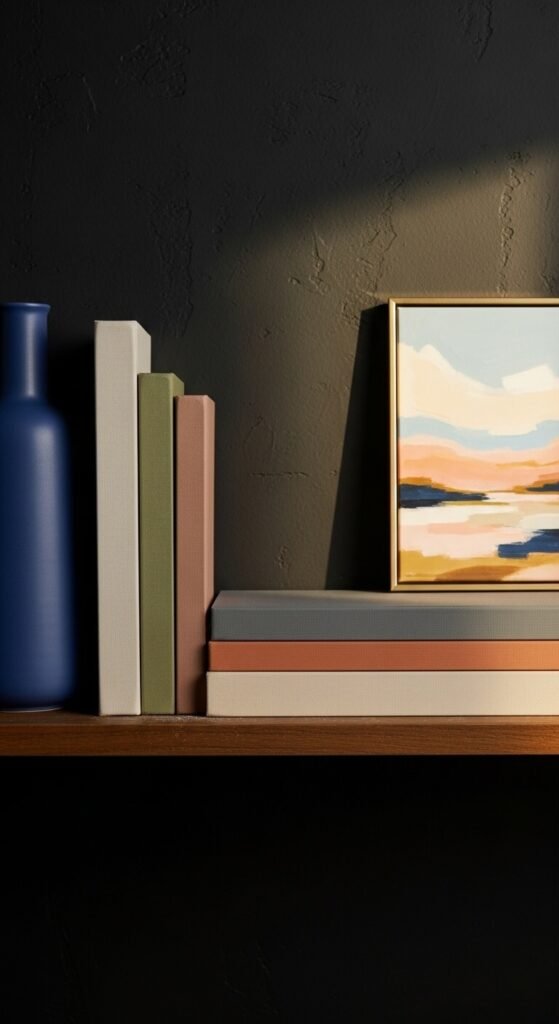
Layer 1: Backdrop Items (large, substantial pieces) These anchor your shelf and provide visual weight. Think: stacks of books, large vases, boxes, or artwork leaning against the back wall.
Layer 2: Middle Ground Objects (medium-height accent pieces) These add personality and interest. Think: small sculptures, candles, decorative bowls, framed photos, or small plants.
Layer 3: Finishing Touches (small, delicate details) These complete the look and add charm. Think: small trinkets, crystals, shells, tiny plants, or decorative objects.
The magic happens when all three layers work together on each shelf. Let’s break down exactly how to make this work.
Start With Your Backdrop Layer
This is your foundation, so always start here. Backdrop items create depth and give your other objects something to sit in front of.
How to place backdrop items:
- Position larger books or objects toward the back corners of the shelf
- Lean artwork or mirrors against the back wall (this adds instant sophistication)
- Use vertical stacks of 3-5 books as anchors
- Place taller vases or objects toward the back
- Create “bookends” with backdrop items on either side
The key is creating height variation. Don’t line everything up at the same height—that’s what makes shelves look flat and boring. Vary the heights of your backdrop pieces to create visual interest from the start.
Add Your Middle Ground Pieces
Now comes the fun part—this is where your personality really shines through. Middle ground objects sit in front of your backdrop items and create that layered, dimensional look.
Strategic placement tips:
- Place objects slightly in front of and to the side of backdrop items (not directly centered)
- Use the rule of triangles: arrange three medium objects in a triangular formation
- Mix heights even within this layer—a short bowl next to a medium candle next to a taller small plant
- Leave some backdrop items partially visible (layering, not hiding)
- Group similar items in odd numbers (3 candles, 5 small frames)
This layer should feel like it’s having a conversation with your backdrop layer. Objects should relate to each other through color, texture, or style, but they shouldn’t match perfectly. Perfect symmetry feels stiff—slight asymmetry feels curated.
Layer In Your Finishing Touches
These are the small details that take your shelves from good to absolutely stunning. Finishing touches add charm and personality without overwhelming the shelf.
Best finishing touch options:
- Small air plants or succulents tucked into corners
- Interesting rocks, shells, or natural objects
- Decorative beads or small sculptures
- Vintage finds or sentimental trinkets
- Small framed photos (leaning, not hanging)
- Crystals or geodes
- Tiny vases with single stems
Place these in front of your middle ground objects or nestle them beside larger pieces. They should feel like little discoveries—details someone notices when they look closely at your shelves.

Master The Negative Space Rule
Here’s where most people mess up: they fill every single inch of their shelves. Professional styling requires breathing room.
The golden rule: Only style 60-70% of each shelf. Leave the rest empty.
Why this matters:
- Negative space lets the eye rest
- It makes your displayed items stand out more
- It prevents that cluttered, overwhelming feeling
- It makes everything look more intentional
- It’s easier to keep clean and dust
If a shelf feels too busy, remove items one by one until it feels balanced. Less is almost always more when it comes to shelf styling.
Balance Color Throughout Your Shelves
Color distribution can make or break your shelf styling. Avoid clustering all similar colors in one spot—spread them throughout for visual balance.
Color strategy:
- Identify your dominant colors (usually 2-3 colors max)
- Distribute these colors across multiple shelves in a Z or triangle pattern
- Use neutral tones (white, black, wood, metallics) as anchors
- Add one pop of color per shelf maximum
- Books are your secret weapon—spine colors can tie everything together
Step back and squint at your shelves. Your eye shouldn’t be drawn to one colorful spot—the color should flow naturally throughout the entire unit.
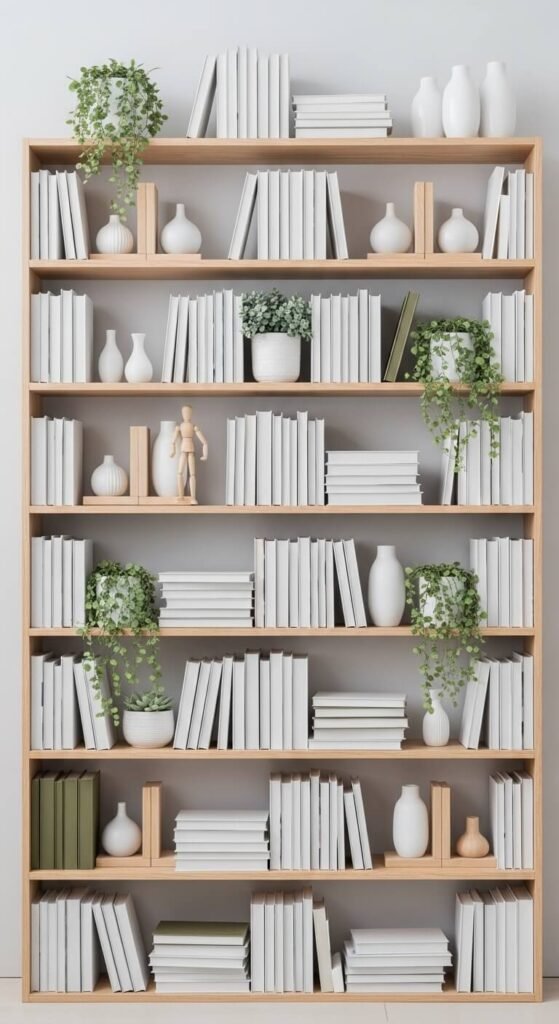
Mix Textures For Visual Interest
Just like with coffee table styling, texture is what makes shelves feel rich and curated rather than flat and one-dimensional.
Combine these textures:
- Smooth: Ceramic vases, glass objects, polished metals
- Rough: Woven baskets, natural wood, stone objects
- Soft: Book spines, fabric-covered boxes, plants
- Shiny: Metallic accents, mirrors, glass
- Matte: Pottery, unglazed ceramics, painted objects
When you mix textures, even simple objects look more expensive and intentional. A wooden bowl next to a brass candlestick next to a ceramic vase creates visual richness that all-ceramic pieces can’t achieve.
Create Rhythm With Repetition
Professional stylists use a trick called rhythmic repetition—repeating certain elements throughout your shelves to create cohesion.
What to repeat:
- A specific color that appears on multiple shelves
- Similar shapes (round objects, square frames, cylindrical vases)
- A material (brass appears 3-4 times, wood appears throughout)
- A style of object (multiple small plants, several candles)
This repetition creates a thread that ties all your shelves together. It’s the difference between “random stuff on shelves” and “cohesive collection.”
The rule: Repeat key elements at least 3 times throughout your shelving unit, but don’t go overboard—you want variety too.
Apply The Triangle Method For Each Shelf
Here’s a pro technique that instantly upgrades any shelf: arrange your objects in triangular formations.
How it works:
- Imagine invisible triangular lines connecting your three layers
- Place a tall backdrop item, a medium item to one side and forward, and a small item to the other side and even more forward
- Your eye should be able to trace a triangle through the heights and depths
- This creates natural visual flow and balance
You don’t need to be precious about this—it’s more of a loose guide than a rigid rule. But when you start seeing triangles in your arrangements, you’ll notice how much more dynamic your shelves look.

Style Books Like A Designer
Books are shelf styling gold, but most people just line them up and call it done. There’s a better way to display books that adds instant polish.
Book styling techniques:
- Mix vertical stacks with horizontal stacks
- Turn some book spines inward for a cleaner look (controversial but effective)
- Stack 3-5 books horizontally, then place an object on top
- Create bookend moments with objects on either side of vertical books
- Vary the heights of book stacks throughout your shelves
- Group books by color for a cohesive look (or keep spines visible if you prefer function)
Books shouldn’t just fill space—they should be part of your overall design. Treat them like the sculptural objects they are.
The Final Step: Edit Ruthlessly
Once you’ve styled your shelves, step back and evaluate. Professional styling often means removing items, not adding more.
Ask yourself:
- Does my eye have somewhere to rest?
- Can I see all three layers clearly?
- Is there too much happening in one spot?
- Would removing one item improve the overall look?
- Does everything feel intentional?
Walk away for an hour, then come back with fresh eyes. You’ll often spot items that need to be removed or repositioned. This editing phase is what separates good shelf styling from great shelf styling.
Ready to transform your shelves? Start with one shelf using the 3-layer method, then work your way through the rest. Remember: backdrop items first, middle ground objects second, finishing touches last. And always leave room to breathe! Save this guide for your next shelf refresh—your beautifully curated shelves are just a few styling layers away! 📚✨