
The difference between a room that looks professionally designed and one that feels unfinished often comes down to one detail: how you hang your curtains. Most people mount curtain rods at the wrong height, choose panels that are too short, or install them too close to the window frame. These common mistakes instantly cheapen a space—no matter how expensive your curtains are.

The good news? Getting curtains right is surprisingly simple once you know the rules. Follow these designer techniques to make your windows—and your entire room—look expensive and intentionally styled.
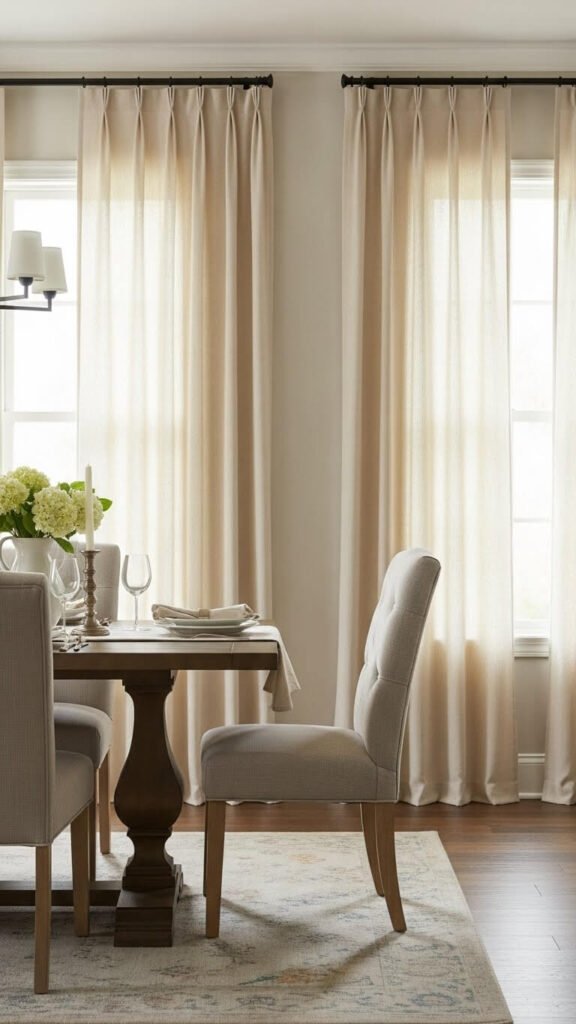
Mount Your Rod At Ceiling Height
This is the single most impactful rule for curtain hanging. Mount your curtain rod as close to the ceiling as possible—not at the top of your window frame.
Why this works:
- Creates the illusion of taller ceilings
- Makes windows appear larger and more grand
- Draws the eye upward, expanding the room visually
- Adds architectural drama to ordinary windows
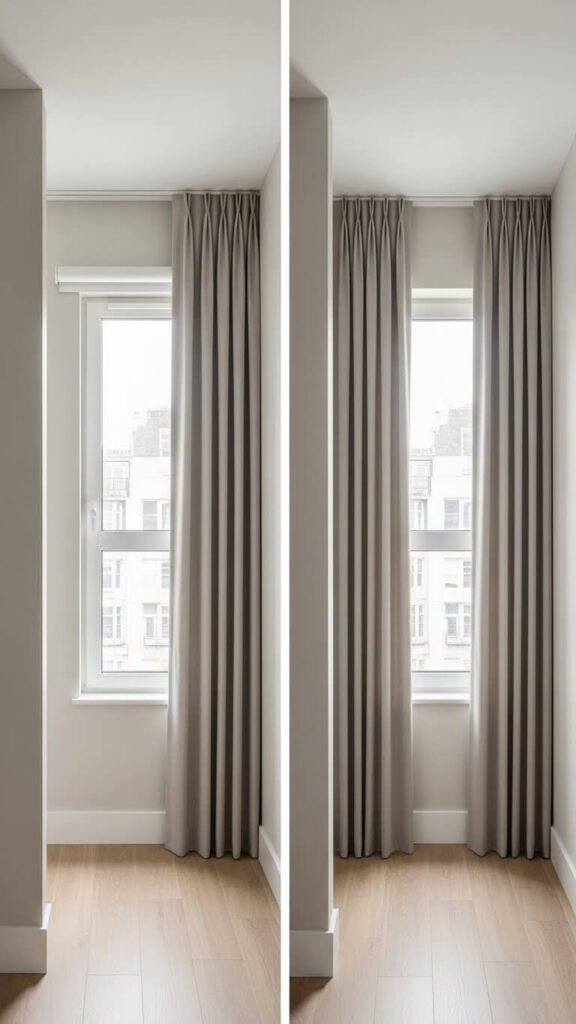
Aim to position your rod 2-4 inches below your ceiling. If you have crown molding, mount the rod just below it. This technique works in rooms with any ceiling height—even 8-foot ceilings benefit from this trick.
Use a level when marking your holes. Crooked rods ruin the entire effect and look sloppy instead of sophisticated.
Extend Your Rod Beyond The Window Frame
Don’t mount your rod just wide enough to cover your window. Extend it 6-12 inches past the frame on each side.
The benefits of wider rods:
- Makes windows look wider and more expansive
- Allows you to fully open curtains without blocking natural light
- Creates better proportions and visual balance
- Frames your window like artwork
For standard windows, extend 8-10 inches on each side. For large picture windows, go 10-12 inches. This means your rod should be 16-24 inches wider than your actual window.
When curtains are drawn open, they should stack completely off the glass, not cover any portion of your window. This maximizes light and makes your window the star.
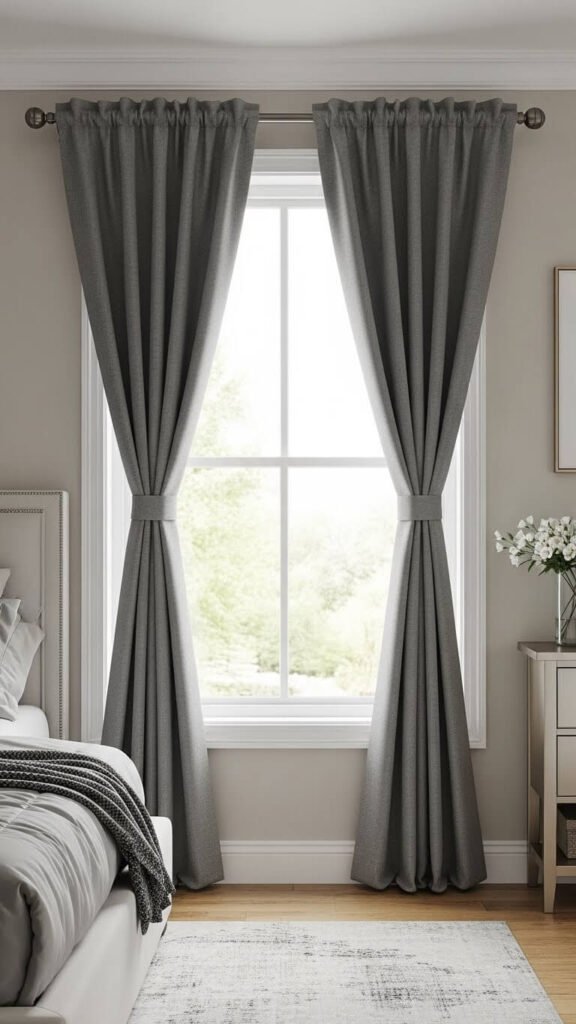
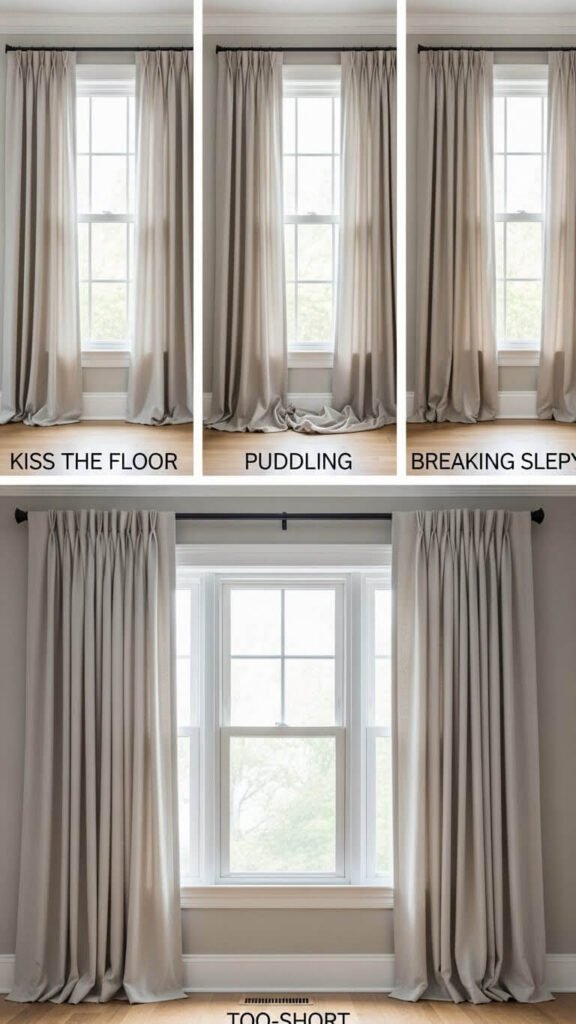
Choose The Right Curtain Length
Short curtains that hover above the floor look dated and cheap. Designers always choose panels that touch or exceed floor length.
Three acceptable curtain lengths:
- Kiss the floor: Panels just barely touch the floor (most common and easiest to maintain)
- Puddle slightly: Fabric extends 1-2 inches past the floor for a luxurious look
- Break: Curtains touch and fold slightly, like tailored pants (sophisticated middle ground)
Never do this:
- Curtains that end mid-window or at the windowsill
- Panels that hang 2-6 inches above the floor (the worst look)
- Curtains that puddle more than 2 inches (gets dirty and looks sloppy)
Measure from your rod to the floor before buying. Most ready-made curtains come in 84, 96, and 108-inch lengths. For standard 8-foot ceilings with rods near the ceiling, 96-inch panels typically work perfectly.
Pick The Right Fullness
Flat, skimpy curtains look cheap no matter how nice the fabric. You want enough fullness to create soft folds when curtains are closed.
Fullness formula:
- Measure your rod width (not your window)
- Multiply by 2 for medium fullness (standard and budget-friendly)
- Multiply by 2.5-3 for luxurious fullness (designers’ preference)
Example: If your rod is 80 inches wide, you need panels totaling 160 inches (2x fullness) or 200-240 inches (2.5-3x fullness) when laid flat.
Most single panels are 50-54 inches wide. For that 80-inch rod, you’d need two panels per side (four total) to achieve proper fullness.
Don’t buy just two panels for a window unless your rod is very narrow. Proper fullness creates that high-end drapery look instead of flat fabric hanging limply.
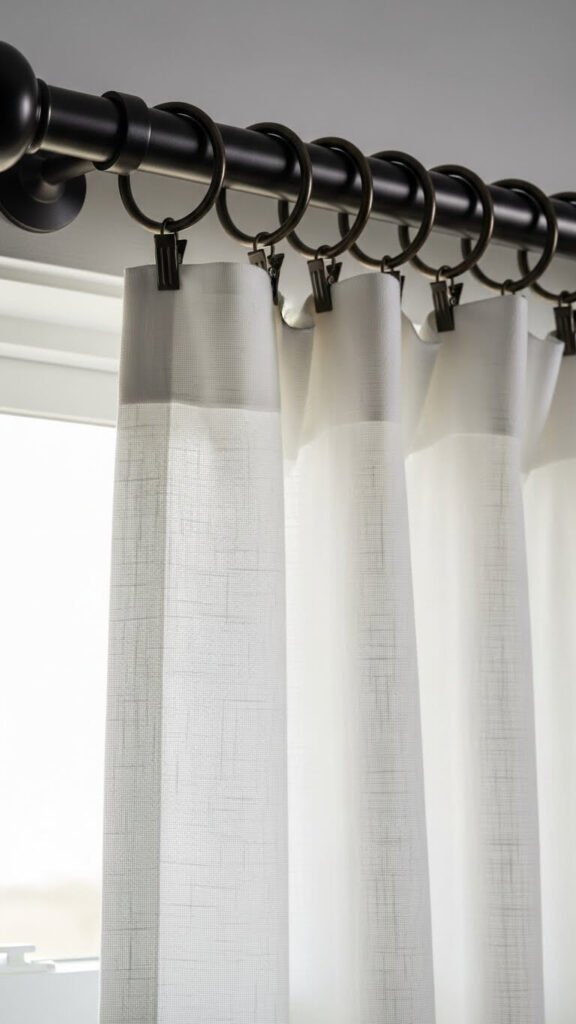
Select Simple, Quality Hardware
Your curtain rod and rings matter more than you think. Cheap plastic or thin metal rods bend, sag, and look flimsy.
Best hardware choices:
- Matte black, brushed nickel, or brass finish (avoid shiny chrome)
- Rods at least 1 inch in diameter for visual weight
- Simple finials—nothing too ornate or dated
- Metal rings with clips or eyelets (not plastic)
IKEA’s Betydlig and Räcka lines offer affordable, good-looking hardware. If you’re investing more, check Restoration Hardware or West Elm. Amazon also has solid options in the $30-60 range for basic rods.
Avoid decorative rod covers or fancy finials that look dated. Simple, substantial hardware always wins.
Choose The Right Fabric And Color
The fabric you choose impacts both function and style. Designers typically stick to neutral, natural fabrics for timeless appeal.
Best curtain fabrics:
- Linen or linen-look: Relaxed, textured, hides wrinkles
- Cotton: Classic, crisp, affordable
- Velvet: Luxurious, insulates well, blocks light completely
- Sheer voile: Filters light, adds softness, often layered
Color strategy:
- White, cream, or soft gray works everywhere and makes ceilings look higher
- Match your wall color for a seamless, expansive look
- Go one shade darker than walls for subtle contrast
- Save bold colors for rooms with high ceilings
Avoid busy patterns, shiny fabrics, or curtains with attached valances—these look dated. Simple, high-quality fabric in neutral tones stays timeless.
Install With Care And Precision
Even perfect curtains look bad if installed carelessly. Take time to measure and install properly.
Installation checklist:
- Use a level for every measurement
- Mark both bracket positions before drilling any holes
- Drill into studs when possible (use anchors for drywall)
- Make sure brackets are secure enough to support the weight
- Test your rod before hanging curtains—it shouldn’t sag in the middle
For very wide windows (over 6 feet), use a center support bracket to prevent sagging. This small detail maintains clean lines.
Step back and check your work from across the room before drilling. Brackets that are even slightly off-level create a sloppy, unprofessional appearance.
Style Your Curtains After Hanging
Once installed, take a few minutes to style your curtains for maximum impact.
Quick styling tricks:
- Steam or iron panels to remove creases (fresh curtains always have fold lines)
- Arrange the fabric in even, soft folds when closed
- Use curtain tiebacks or holdbacks to create intentional draping when open
- Let panels hang for 24 hours before final adjustments—fabric settles
For the puddle or break effect, arrange the extra fabric so it falls naturally toward the back, not bunched forward where people walk.
Conclusion
Hanging curtains correctly transforms your entire room. Mount your rod at ceiling height, extend it wide past your window frame, and choose panels that touch or exceed the floor. These three rules alone will make your windows look expensive and your ceilings feel taller.
Don’t rush the process. Measure carefully, invest in decent hardware, and take time to install everything level. The difference between curtains that look cheap and curtains that look designer often comes down to these simple measurements and installation details.
Save this guide for your next curtain project—your windows (and your entire space) will thank you! The polished, high-end look you’re after is just proper hanging technique away.