
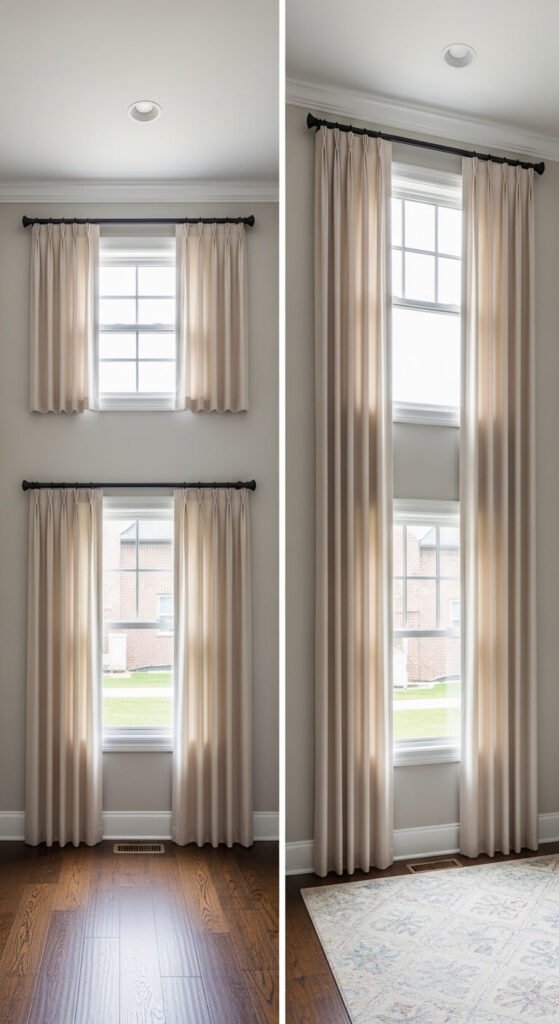
There is one curtain mistake that appears in more homes than any other — and it is not the fabric, not the color, not the pattern. It is the height. Curtain rods hung just above the window frame are one of the most common home decorating errors in existence, and they silently make every room they are in feel shorter, smaller, and less designed. The fix costs nothing. You already own the curtains. You just need to move the rod up — and once you know the rule, you will never look at a low-hung curtain without noticing it again.
Here is the complete guide to hanging curtain rods correctly — the first time.
The One Rule That Changes Everything
The rule is simple and absolute: hang the curtain rod as close to the ceiling as possible.
Not four inches above the window frame. Not halfway between the window and the ceiling. As close to the ceiling line as the bracket hardware allows — ideally within two to four inches of the ceiling itself.
This single change does three things simultaneously:
- Makes the ceiling appear taller — the vertical line of the curtain panel draws the eye upward to the ceiling, creating the perception of height regardless of how high the ceiling actually is
- Makes the window appear larger — the curtain frames the full wall height rather than just the window opening, giving the window a dramatically bigger visual footprint
- Makes the room feel more designed — this is the exact placement used in professionally decorated rooms, hotel suites, and interior design photography
Standard ceiling height in most homes is eight to nine feet. A rod at ceiling height means panels should be approximately 96 to 108 inches long. Most retailers sell curtains in 84-inch and 96-inch lengths — always choose the longer option and let them pool slightly or hang just at the floor.
How Wide to Extend the Rod Beyond the Window
Height is the primary rule. Width is the secondary one — and it matters just as much for how large the window reads once the curtains are open.
The standard: extend the rod 10 to 15 inches beyond the window frame on each side.
When the curtains are pulled open, they should sit entirely beside the window glass — not overlapping any part of it. This allows 100% of the window glass to be exposed during the day, maximizing natural light.
A rod that extends only four to five inches beyond the frame means the open curtain panels cover a portion of the window permanently. The room loses light. The window looks smaller. The curtain looks like it was measured incorrectly.
For very wide windows or picture windows:
- Extend 15 to 20 inches per side for maximum visual width
- Use a rod long enough to reach the full extended width — measure before purchasing
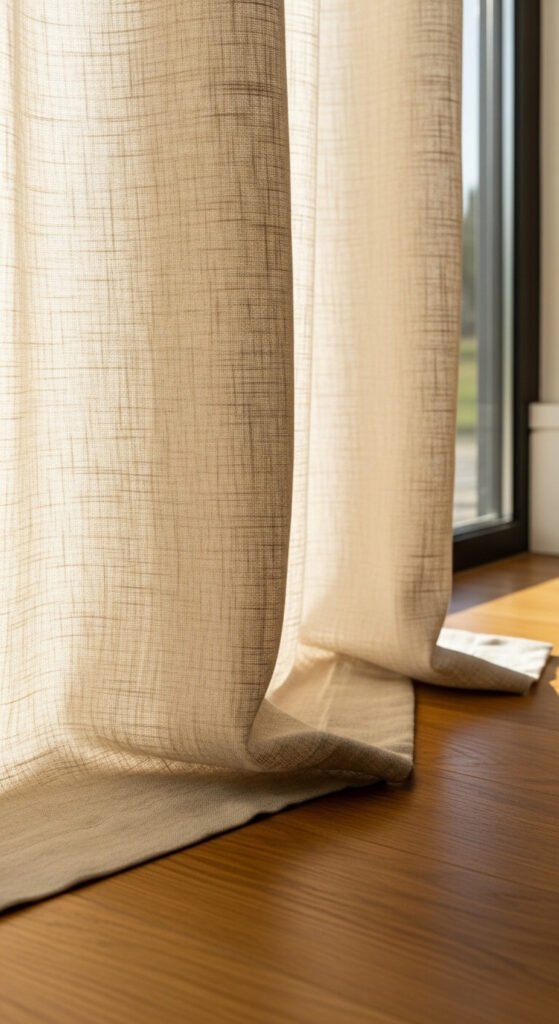
What Length Curtains to Buy
Once you know where the rod sits, curtain length becomes a straightforward calculation.
Measure from the rod to the floor. Then choose from these options:
- Exactly floor length (0 inch clearance): Clean and contemporary. The hem just grazes the floor.
- Half-inch above the floor: The most practical option — easier to vacuum and wash without the hem dragging.
- Pooling (one to three inches extra length): Romantic and luxurious. Works in bedrooms and formal living rooms where the soft pile of fabric on the floor is intentional.
What to avoid:
- Curtains that hover two to four inches above the floor — this looks like a mistake, not a style choice
- Curtains that are too short for the ceiling-height rod — buy longer panels and hem them rather than living with the wrong length
When in doubt, buy longer and hem shorter rather than buying the closest available length and hoping it works. A tailor can hem curtain panels for $10 to $25 per panel. The result is always worth it.
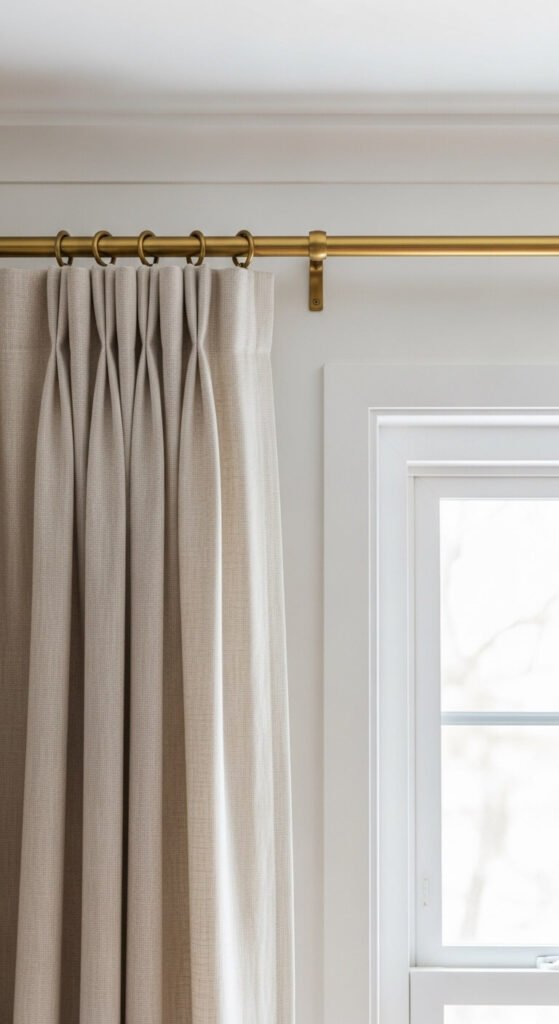
The Hardware Matters More Than You Think
The rod bracket, the finials, and the rings are the visible hardware elements — and their finish, scale, and quality affect how the whole installation reads.
Quick hardware rules:
- Match hardware finish to other metals in the room — brass rod with brass lamp, black rod with black fixtures
- Use a rod diameter of at least 1 inch — thin rods look flimsy on floor-length panels and can sag in the middle on wide windows
- For heavy velvet or blackout curtains, use a double-thickness rod or a ceiling-mounted track rather than a standard wall bracket — the weight requires more support
- Ceiling-mounted curtain tracks (rather than wall brackets) produce the cleanest look and hang the panels closest to the ceiling — available for $20 to $60 for most window widths
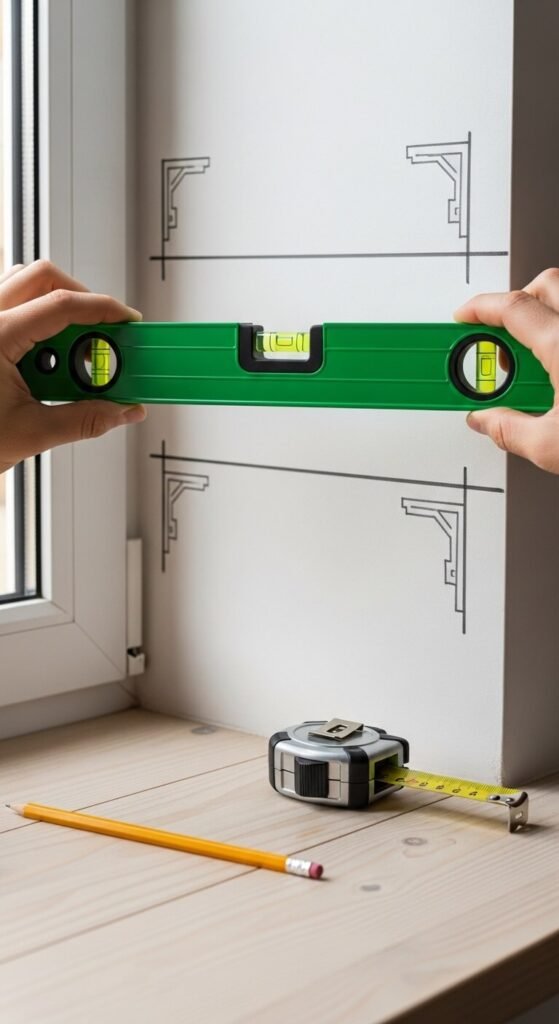
How to Mark the Bracket Position Correctly
Getting the placement right before drilling is the step that prevents regret.
- Mark the ceiling height on the wall with a pencil — lightly
- Measure down two to four inches from the ceiling and mark the bracket center point
- Measure the rod extension on each side of the window frame and mark both bracket positions
- Use a level across both bracket marks before drilling — an unlevel rod is immediately visible once curtains are hung
A standard drill, two wall plugs, and two screws are all the tools needed for most bracket installations. The entire installation takes 20 to 30 minutes.
One Change. Entire Room.
No other single decorating change — not a new rug, not fresh cushions, not a gallery wall — produces as immediate and dramatic a visual impact as moving curtain rods from just-above-the-window to ceiling height.
The room feels taller. The window feels larger. The whole space looks like someone who knew what they were doing made a deliberate design decision. Because they did.
Save this and share it with anyone who has ever wondered why their curtains do not look quite right — because this is almost certainly the reason, and the fix is two bracket holes higher up the wall.