
A tapestry is one of the fastest, most affordable, and most dramatic ways to transform a blank wall into a genuine focal point. One large textile — draped, hung, or mounted — does what a single canvas often can’t: it adds texture, softness, warmth, color, and a handmade quality that immediately makes a room feel more layered and more personal. And unlike a framed piece of art, a tapestry can cover an enormous amount of wall with a single move. The challenge, of course, is that most people have no idea how to actually hang one without putting holes in their walls, watching it sag in the middle, or creating a crooked disaster that never quite lies flat. All of that is completely fixable — and simpler than you’d expect.
Whether you’re a renter protecting your deposit or a homeowner who just wants a damage-free solution, here are the best methods for hanging a tapestry beautifully — without a single regret.
Choose Your Hanging Method Based on Your Wall and Tapestry
Before reaching for a hammer or a pack of adhesive strips, assess two things: the weight of your tapestry and the type of wall you’re working with. These two factors determine which method will hold cleanly, lie flat, and come down without drama.
Lightweight tapestries (thin cotton, sheer fabrics, small sizes):
- Work beautifully with adhesive strips, washi tape, or push pins
- Can be hung with a single rod threaded through the top hem if one exists
Medium-weight tapestries (standard woven cotton or polyester, medium to large):
- Benefit from a curtain rod or wooden dowel for even distribution
- Command strips rated for heavier loads work well if you don’t want hardware
Heavy or large tapestries (thick woven textiles, oversized pieces, those with fringe or embellishment):
- Need proper support — a curtain rod mounted with anchors, or a wooden dowel hung on two hooks
- Adhesive alone will not hold reliably over time for heavy pieces; don’t risk the sag
Wall type matters too:
- Drywall — works with most methods including command strips and lightweight hooks
- Plaster walls — older and more brittle; adhesive strips are safer here than nails which can crack the surface
- Brick or concrete — requires masonry hooks or brick clips; adhesive strips typically don’t adhere well to porous surfaces
- Rental walls — default to damage-free methods every time; your deposit will thank you
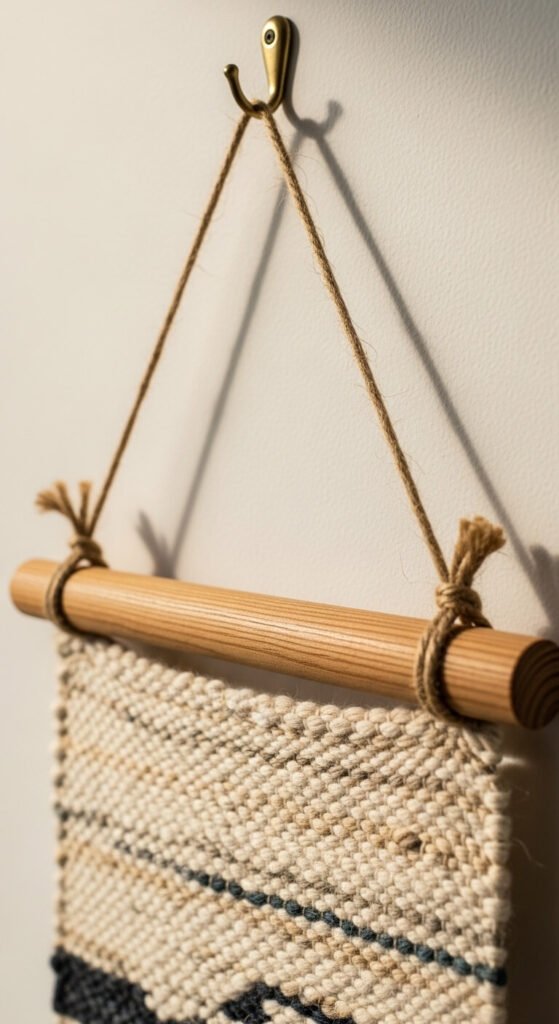
Method One: The Curtain Rod or Dowel Approach
This is the most polished, most professional-looking method — and it works for tapestries of almost every size and weight. A curtain rod or wooden dowel distributes the tapestry’s weight evenly across the full width, preventing sagging, keeping the top edge straight, and giving the whole thing a finished, intentional look.
How to do it:
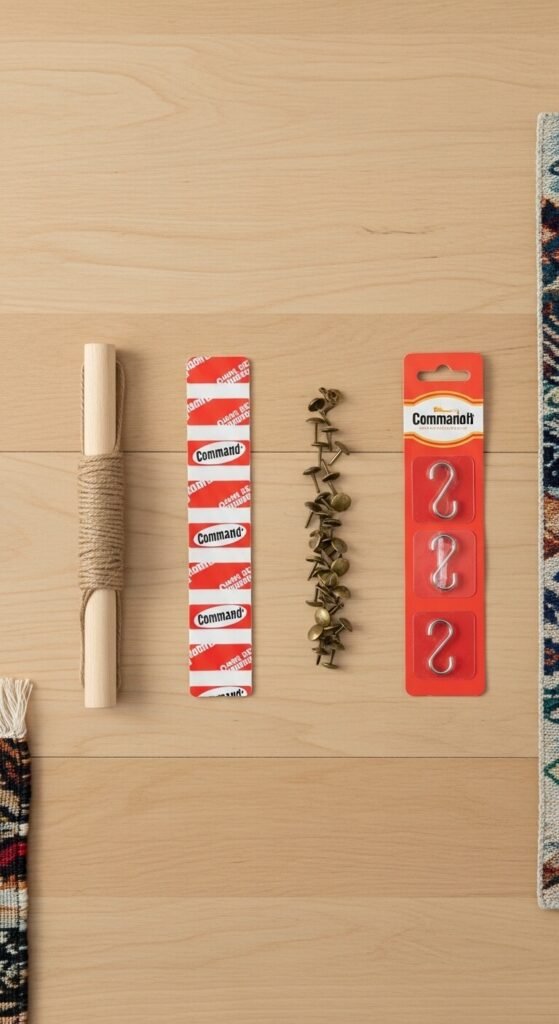
- Choose your rod or dowel — a tension rod requires no hardware at all and works between two walls; a curtain rod mounted with brackets gives you more control over placement; a wooden dowel in natural or painted finish looks beautifully rustic and bohemian
- Thread the rod through the top hem if your tapestry has one — most do; if not, use binder clips or curtain rings clipped along the top edge to attach it to the rod
- Mount your brackets or hooks — for a damage-free version, use adhesive hooks rated for the weight of your rod and tapestry combined; for a more permanent installation, use wall anchors for a secure hold
- Hang and adjust — slide the tapestry along the rod to center it, then step back and check that the top edge is level before calling it done
Method Two: Adhesive Strips and Damage-Free Hooks
For lighter tapestries and renter-friendly installations, adhesive products have improved dramatically — and when used correctly, they hold reliably and remove cleanly without taking paint with them.
The right products for the job:
- Command strips (the picture-hanging variety) — press directly onto the back of the tapestry fabric at several points along the top edge; space them every 6 to 8 inches for even support
- Adhesive hooks — mount hooks in a row across the top of the wall, then drape the tapestry over them or attach it with loops of ribbon sewn or safety-pinned to the top hem
- Velcro strips — one side adheres to the wall, the other to the fabric; particularly effective for lightweight tapestries because the full-width contact keeps the top edge perfectly flat
Tips for adhesive success:
- Always clean the wall surface with rubbing alcohol before applying and let it dry fully — adhesion to dusty or greasy walls is significantly weaker
- Press firmly for at least 30 seconds on each strip
- Wait the full recommended time (usually 1 hour) before hanging any weight on the strips
- Never use adhesive on textured, freshly painted, or wallpapered surfaces — it will pull the surface when removed
Method Three: Push Pins and Tacks for Casual Walls
Sometimes the simplest solution is the right one. For lighter tapestries in rooms where you don’t mind the occasional small hole — or in rental situations where tiny pin holes are generally acceptable — push pins are fast, flexible, and easy to adjust.
How to make push pins look intentional:
- Use decorative map pins or brass upholstery tacks instead of standard office push pins — the aesthetic difference is significant
- Space them evenly across the top of the tapestry — every 6 to 8 inches — so the weight is distributed and the top edge doesn’t dip between pins
- For a more structured look, pin through a thin strip of balsa wood or a flat ruler running across the back of the tapestry’s top edge; this keeps everything perfectly straight
- Use a level — even a phone level app — to make sure your first pin placement is straight before committing the full row
Getting the Placement and Sizing Right
Method aside, placement determines whether your tapestry looks designed or accidental.
Sizing guidelines:
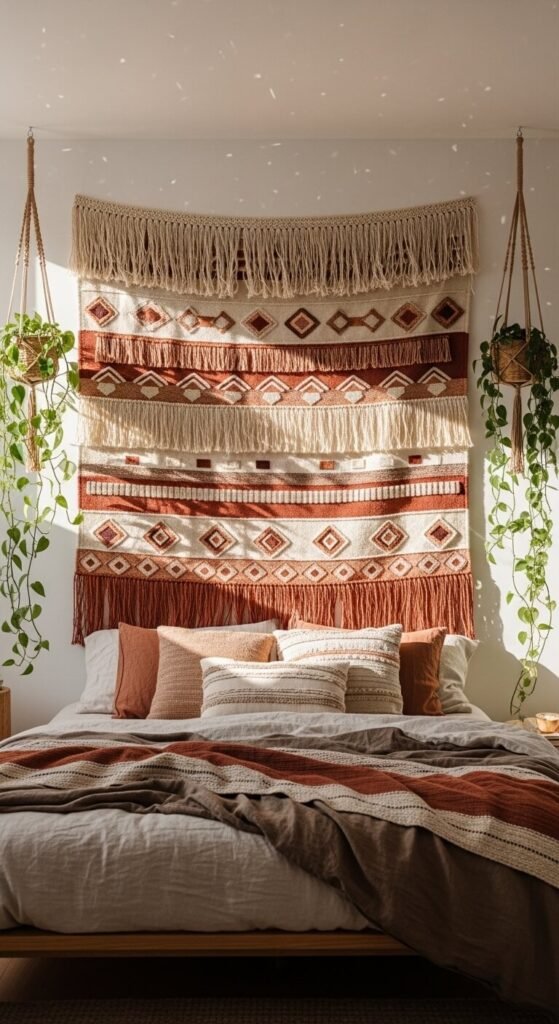
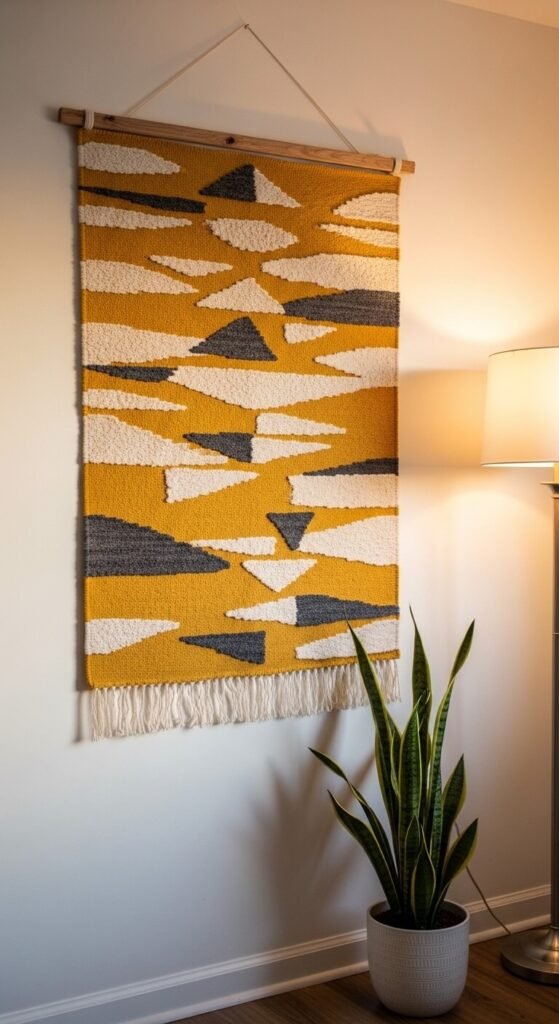
- A tapestry hung above a bed should span at least two-thirds the width of the bed — ideally close to the full width for the most dramatic, considered effect
- A tapestry on a feature wall should fill at least half the wall’s width to feel intentional rather than lost
- If your tapestry is smaller than ideal for the wall, layer it over a lighter fabric or a painted surface for added presence
Height placement:
- In a bedroom, the tapestry should hang close enough to the headboard that the two feel connected — not floating above with a gap of empty wall between them
- On a standard wall, center the tapestry at approximately 57 to 60 inches from the floor — the same gallery-standard height that works for all wall art
One final styling tip: Add something in front of or beneath the tapestry — a plant, a lamp, a small shelf — to connect it to the room and prevent it from feeling like it’s hovering in isolation.
Instant Art, Zero Damage
A tapestry is one of the most accessible and most impactful decor upgrades available — and now you have every method, every tip, and every sizing rule you need to hang it beautifully without touching a single power tool or leaving a single mark on your walls.
Save this guide before your next tapestry purchase, share it with a fellow renter who’s been afraid to decorate, and go hang something that makes your walls worth looking at. 🧵✨