
Here is one of the best-kept secrets in interior design: the difference between a surface that looks cluttered and one that looks styled is almost never the objects themselves. It is whether those objects are sitting inside a tray. A candle, a small plant, and a stack of books placed directly on a coffee table look like things someone put down and forgot. The same three objects inside a wooden tray look like a deliberate, curated vignette. The tray does not change the objects — it changes how the eye reads them. It turns scatter into composition.
The good news is that tray styling is one of the most forgiving and most reversible decorating techniques available. You cannot get it permanently wrong. Here is exactly how to do it well in every room.
The Core Rule: Five Objects Maximum
Before choosing a tray or deciding what goes inside it, commit to one rule that makes every tray display work: never place more than five objects inside a single tray.
Five is the upper limit. Three is often better.
More than five objects and the tray stops looking curated and starts looking like a surface with a border around it. The tray’s entire purpose — to group disparate items into one intentional composition — only works when the objects inside have enough visual breathing room between them.
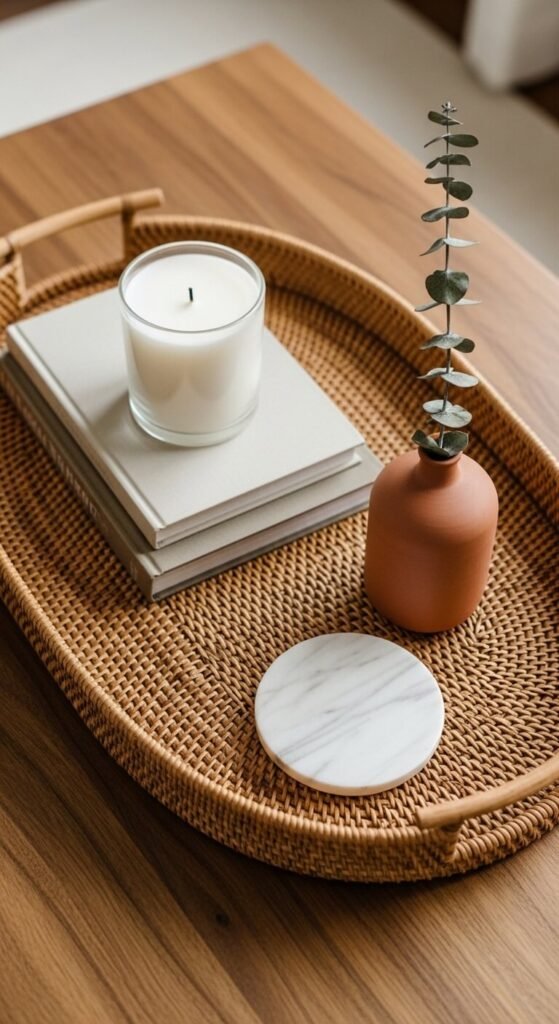
The ideal five-object formula:
- One tall element (a vase, a candle, a plant)
- One medium element (a small book stack, a bowl, a candle holder)
- One low flat element (a coaster, a small dish, a marble sphere)
- One organic element (a dried stem, a small plant, a stone)
- One functional element (a remote, a lip balm, whatever actually gets used here)
This formula creates height variation, material contrast, and visual interest — the three things that make a tray display look considered rather than random.
Match the Tray Material to the Surface
A tray should complement the surface it sits on rather than compete with it. Material contrast — not matching — is the goal.
Tray material pairings that work:
- Rattan or woven tray on a dark wood or lacquered surface — the natural texture provides warmth and contrast
- Marble or stone tray on a wooden surface — the cool stone against warm wood creates a sophisticated material story
- Gold or brass tray on a dark marble surface — the metallic warmth glows against the deep background
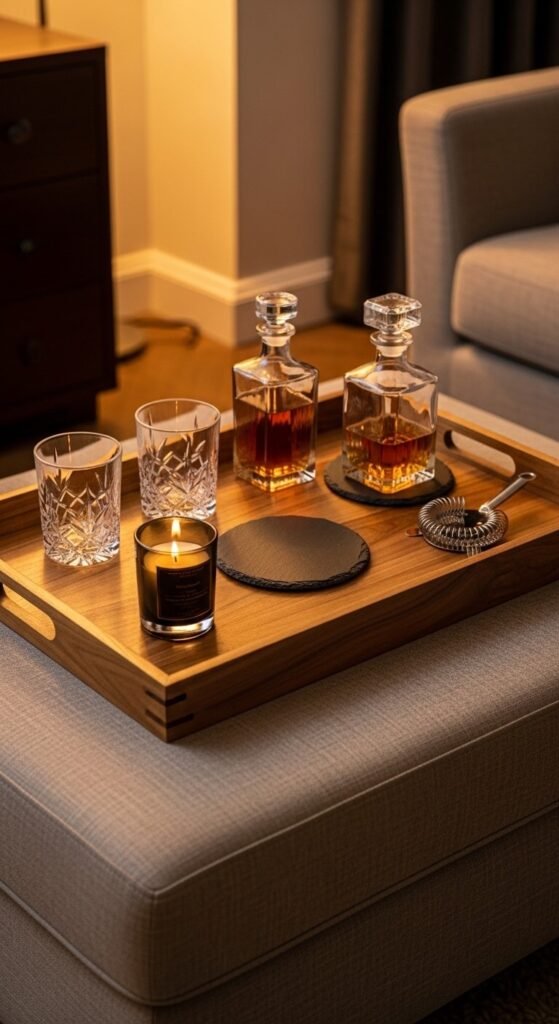
- Wooden tray on an upholstered ottoman — the hard tray provides a stable, styled surface on the soft furniture below
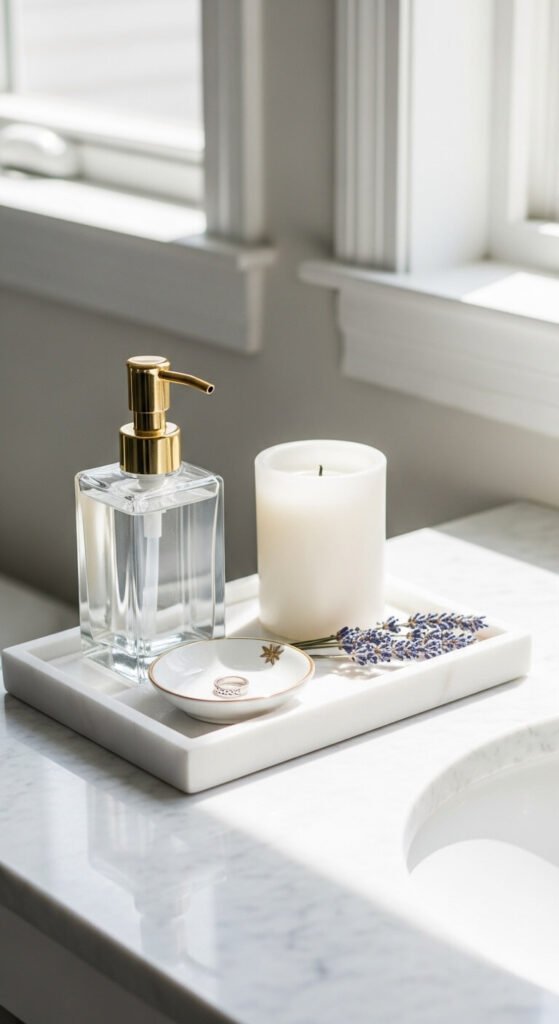
- White ceramic tray on a linen or fabric surface — the clean ceramic reads as refined and deliberate
The one combination to avoid: a tray in the same material and color as the surface it sits on. A wooden tray on a wooden table disappears visually. The tray needs to be readable as a distinct zone from the surface beneath it.
Which Surfaces Get Trays (And Which Don’t)
Almost every horizontal surface in a home benefits from a tray — but the tray’s size and purpose changes depending on the room.
Coffee table: Use a tray that is roughly one-third to one-half the length of the table. The remaining surface stays clear for drinks and books.
Bedside table: A small round or rectangular tray corrals the overnight essentials — a glass of water, lip balm, a phone charger — so the nightstand looks organized rather than scattered.
Kitchen island or counter: A longer rectangular tray at one end groups the daily-use cooking essentials — olive oil, salt, a small herb plant — into one accessible, attractive zone.
Bathroom counter: A small tray containing only the items used daily. The tray prevents the counter from becoming a catch-all for every product in the room.
Entryway console: A small catch-all tray positioned immediately inside the front door for keys, coins, and cards. This is the most functional tray in the home and the one that saves the most daily frustration.
How to Style the Objects Inside the Tray
Once the tray is placed, the object arrangement follows one principle: vary the heights, vary the materials, leave space between them.
Practical arrangement steps:
- Place the tallest object first — toward the back of the tray or slightly off-center
- Position the medium object beside it, leaving visible space between them
- Place the lowest object toward the front, closest to the viewer
- Add the organic element — a sprig, a stone, a small plant — as the finishing touch that softens the composition
- Step back and look. If it feels crowded, remove one object. If it feels too spare, add the one organic element
The tray itself frames everything inside it — which means you do not need to fill the tray to its edges. White space inside the tray is part of the design.
The Seasonal Swap System
One of the most practical benefits of tray styling is how easily it refreshes with the seasons. The tray itself stays permanently on the surface — only the objects inside it change.
A simple four-season swap schedule:
- Winter: Pine cones, a white pillar candle, a small ceramic with a red or dark berry sprig
- Spring: A small bud vase with fresh tulips or a small potted herb, a light candle, a pastel-toned ceramic object
- Summer: A seashell, a white candle, a small succulent in a terracotta pot
- Autumn: A mini pumpkin, a deep amber candle, a few dried leaves or a dried cotton stem
Each seasonal refresh costs $3 to $10 and takes two minutes. The tray stays. Only the story inside it changes.
One Tray Changes Everything
Start with the surface in your home that accumulates the most clutter — a coffee table, a kitchen counter, a bedside table. Place a tray on it. Move the clutter into the tray, keep only three to five objects, and remove the rest.
The result will look more designed than anything else in the room — immediately, without any additional purchases, without moving any furniture.
Save this article and share it with anyone who has ever wondered why their surfaces always look messy no matter how often they tidy — a tray is almost always the answer.