
Family photos belong in your home. Full stop. The idea that personal photos and good design can’t coexist is one of the most persistent — and most unnecessary — myths in decorating. The homes that feel truly alive are the ones that tell a story. The trick isn’t hiding your family’s history behind a minimalist aesthetic. It’s displaying it with the same intention you’d bring to any other design decision. Done right, family photos make a home feel rich, layered, and completely irreplaceable. Here’s how to get there.
Edit First — Display Only Your Best
The fastest way to make a photo display look dated and cluttered is to put up everything. Every vacation snapshot, every birthday, every moment documented over twenty years — all competing for attention at once.
Edit before you hang a single frame.
Ask yourself honestly:
- Is this photo genuinely beautiful, or am I keeping it purely for the memory?
- Is the lighting, composition, or expression strong enough that a stranger would pause at it?
- Does this image add something visually — contrast, emotion, visual interest — to the wall?
The memories that matter most don’t need to be on the wall to matter. A curated selection of your ten to fifteen most visually compelling images will feel more meaningful — and look far better — than fifty photos crowding every surface.
Quality over quantity is the single most important principle in photo display.
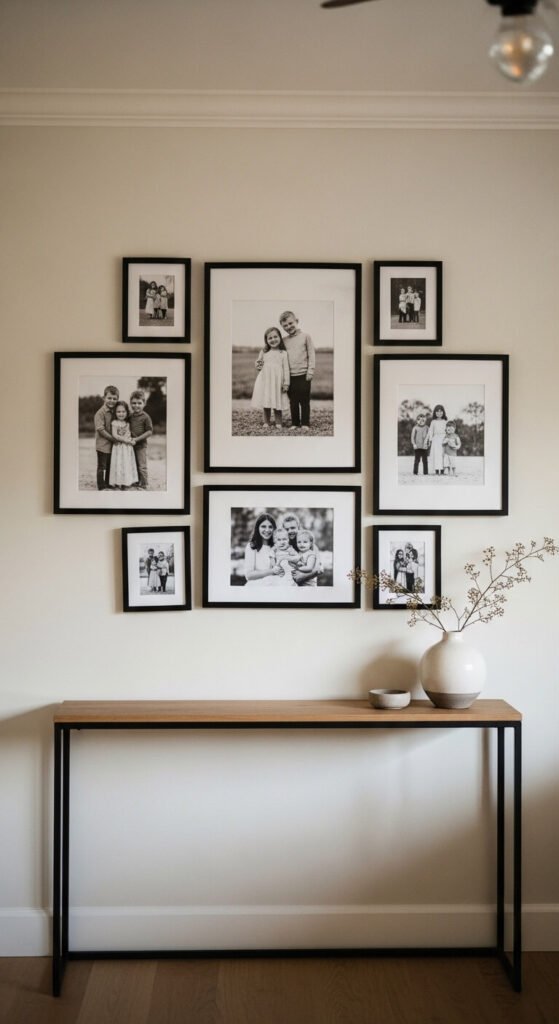
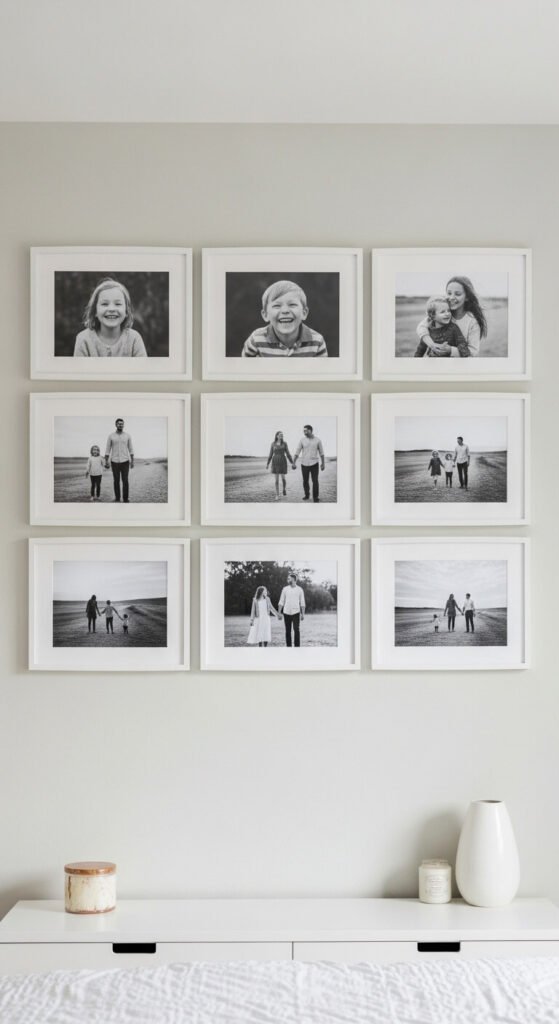
Commit to a Consistent Frame Style
Nothing dates a photo display faster than a collection of mismatched frames — different colors, different materials, different thicknesses, all competing with each other and with the photos themselves.
Pick one frame direction and stick to it throughout a single display or room:
- All black frames — clean, graphic, and works with virtually any wall color or interior style
- All white or off-white frames — soft and gallery-like, especially on light walls
- All natural wood — warm and organic, pairs beautifully with earthy or Scandinavian-inspired interiors
- All thin metal in brushed brass or gold — elegant and slightly elevated without feeling formal
Mixing frame sizes within the same finish looks intentional. Mixing finishes, even subtly, looks accidental. If you have existing frames in different styles, a few cans of the same spray paint will unify them in under an hour for almost no cost.
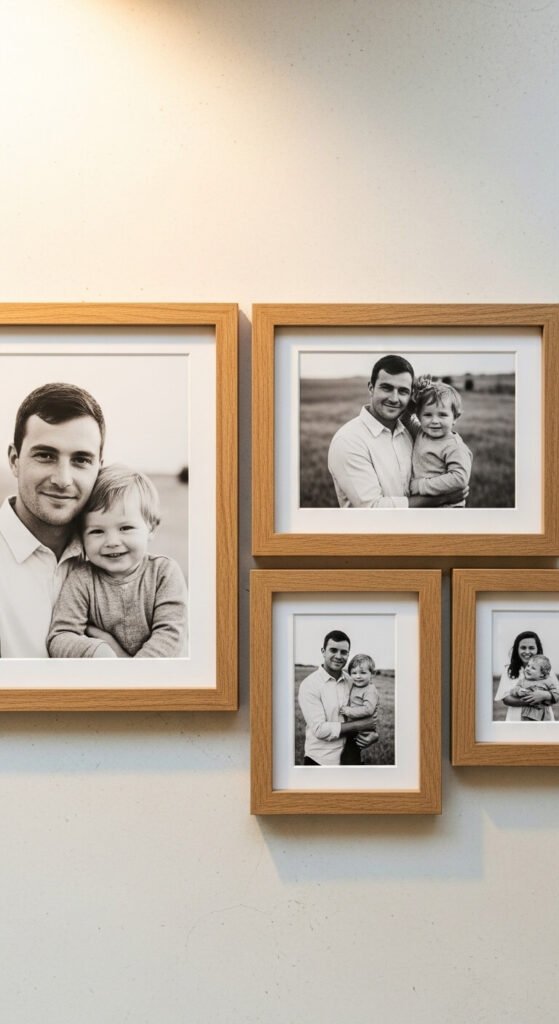
Convert to Black and White for Instant Cohesion
This is the single easiest upgrade available to anyone displaying family photos — and it costs almost nothing.
Color photos from different eras, different cameras, and different lighting conditions will almost always clash with each other and with your home’s color palette. A snapshot from 2009 shot in harsh flash light next to a warm golden-hour photo from last summer — both look fine individually, both look jarring together.
Convert everything to black and white and the problem disappears entirely.
Black and white photographs:
- Look cohesive regardless of when or where they were taken
- Age beautifully — they never look “from that era” the way color photos do
- Feel more artistic and considered, even when the original image is a simple candid
- Work with any wall color, any frame finish, and any interior style
Most phones and photo editing apps convert images to black and white in seconds. Print them at a local photo lab or through an online service like Artifact Uprising or Chatbooks, and the result looks professional at minimal cost.
Think Beyond the Living Room Wall
The predictable place for family photos is the living room gallery wall. And while that works beautifully, limiting yourself to one wall in one room means missing some of the most natural and impactful spots in the home.
Places that often work even better:
- The stairwell wall — a vertical arrangement that follows the staircase line, telling a chronological story as you climb
- A bedroom dresser — two or three framed photos in a casual grouping feel intimate and personal without dominating the room
- A home office shelf — one or two meaningful images among books and objects add warmth without turning the workspace into a shrine
- A hallway end wall — a single large, beautifully printed photo can anchor a hallway the way art would
- The kitchen — often overlooked, but a small framed photo near the coffee station or on a floating shelf adds surprising warmth to a functional space
Spreading photos through the home lets each one breathe, makes each placement feel intentional, and tells the story of your family across the whole house rather than concentrating it in one corner.
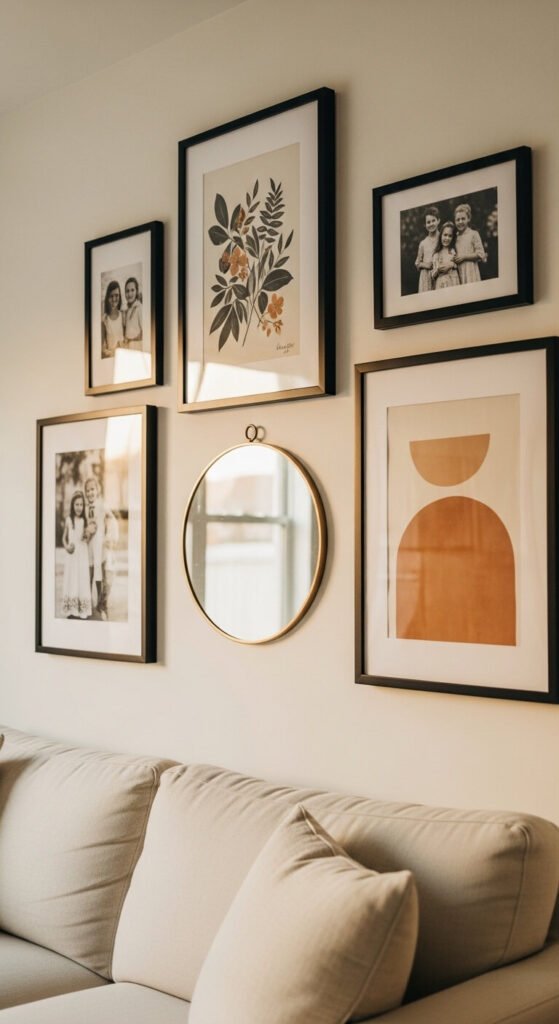
Mix Photos With Art and Objects — Don’t Isolate Them
One of the most effective ways to keep family photos from looking like a dated “photo wall” is to stop treating them as a separate category of object.
Mix them in with everything else.
A gallery wall that includes one family photo alongside a botanical print, an abstract, and a small mirror reads as a curated art arrangement. A wall of only photos reads as a photo wall — and carries all the visual associations that come with it.
Try these combinations:
- One large family photo as the anchor of a gallery wall, surrounded by prints, artwork, and a small mirror
- A framed photo on a shelf alongside books, a small plant, and a ceramic object — integrated, not spotlighted
- A single oversized print of a meaningful landscape or candid moment, treated and hung exactly like fine art
The goal is for photos to feel like part of the home’s design story, not a separate sentimental layer laid over it.
Your Story Deserves to Be on the Wall
The homes that feel the most alive — the ones people walk into and immediately feel something — are the ones that belong to someone. Photos make a home belong to you. They just need to be chosen carefully, framed consistently, and displayed with the same intention you bring to every other design decision.
Edit to your best images. Pick one frame style. Go black and white. Spread them through the home. Mix them with art. That’s the whole formula.
Save this article for your next photo refresh — and share it with anyone who’s been hiding their family photos in a drawer because they didn’t know how to display them beautifully.