
You know that blank wall that’s been staring at you for months? The one that feels like it needs something, but you’re terrified of making a million nail holes and ending up with a Pinterest fail?
Gallery walls seem intimidating, but here’s the truth: you don’t need a design degree or a professional installer to create one that looks incredible. With the right approach and a few insider tricks, you can transform that empty wall into a stunning focal point that looks like you hired someone to do it.
Ready to finally tackle that wall? Let’s break down exactly how to create a gallery wall that looks polished, intentional, and completely professional—no designer required.
Plan Your Layout On The Floor First
This is the step that separates amateur gallery walls from professional-looking ones. Never start hanging without a plan.
Here’s your game plan:
- Clear a large floor space that mimics your wall dimensions
- Lay out all your frames, moving them around until you love the arrangement
- Take a photo from above for reference
- Measure the distances between frames (keep it consistent—usually 2-3 inches)
Think of this as your blueprint. You’re problem-solving all the spacing and balance issues before you commit to the wall. This simple step will save you from the dreaded “oops, that’s not centered” moment when you’ve already made five nail holes.
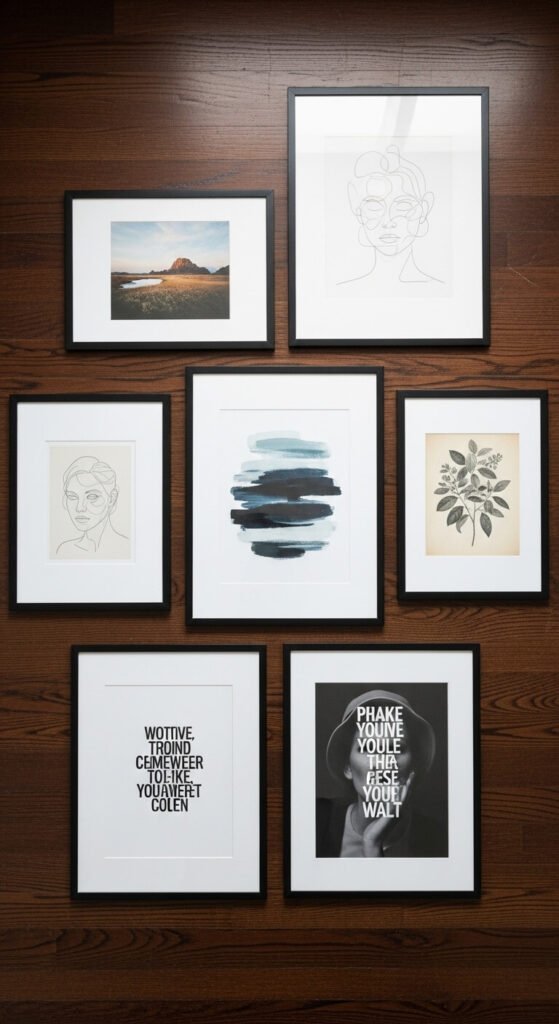
Choose A Cohesive Frame Style
Want to know the fastest way to make your gallery wall look professional? Consistency in framing.
You have two foolproof approaches:
Option 1: All matching frames
- Same color (black, white, natural wood, or gold)
- Same or complementary styles
- Creates a clean, cohesive look instantly
Option 2: Mixed frames with intention
- Stick to two frame colors maximum
- Keep a consistent element (all wood tones, or all metallics)
- Vary the sizes but maintain style harmony
Avoid the random mix of leftover frames from different decades. Even if your art is eclectic, unified framing pulls everything together and screams “I did this on purpose.”
Pick Your Gallery Wall Style
Not all gallery walls are created equal. Choosing a style upfront will guide all your other decisions.
Grid Style: Frames are the same size, arranged in neat rows and columns. Perfect for a modern, minimalist look.
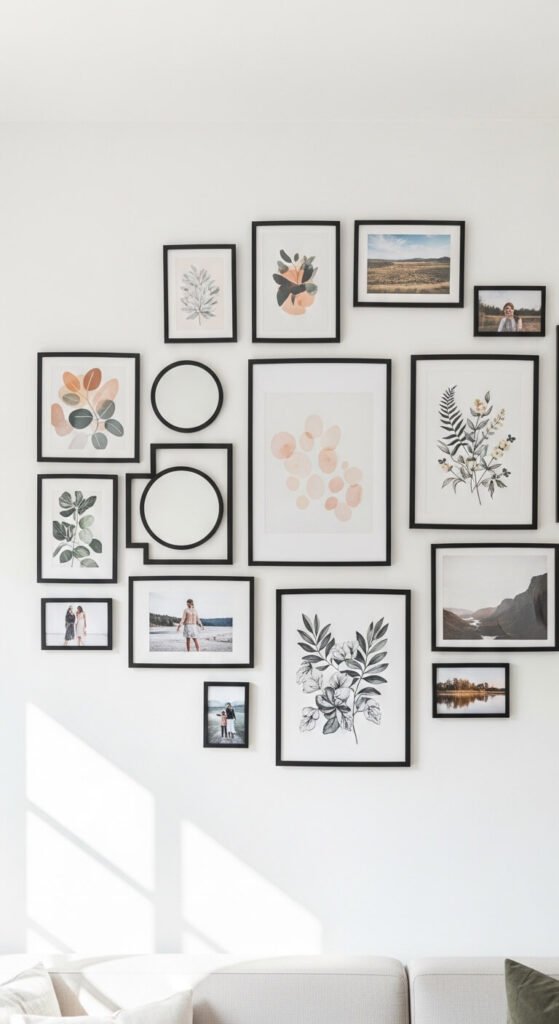
Salon Style: Mix of different frame sizes arranged organically, often centered around one large piece. Classic and sophisticated.
Horizontal Line: Frames aligned along a central horizontal line, like a floating shelf effect. Great for hallways or above furniture.
Symmetrical: Balanced arrangement with a clear center point. Feels formal and put-together.
Choose the style that fits your space and aesthetic. When in doubt, salon style is the most forgiving and works in almost any room.
Master The Spacing Formula
Here’s where most DIYers go wrong: inconsistent spacing. Professional gallery walls have intentional, consistent gaps between frames.
The magic numbers:
- 2-3 inches between frames is the sweet spot
- Too close (under 2 inches) feels cramped
- Too far (over 4 inches) looks disconnected
- Keep this spacing consistent throughout
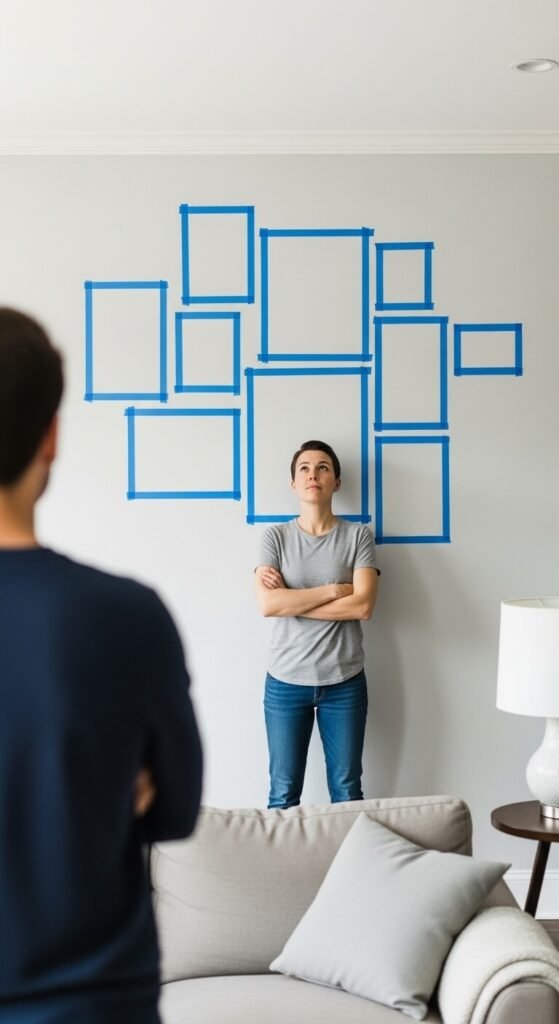
Use painter’s tape to mark your frame positions on the wall before hammering. This lets you visualize the spacing and make adjustments without damage. Mark the top center of each frame with a small piece of tape, then step back to check your work.

Start With Your Anchor Piece
Every professional gallery wall has an anchor—the piece your eye goes to first. Install this one first, then build around it.
Your anchor piece should be:
- The largest frame in your collection, OR
- The most visually striking piece, OR
- Positioned at eye level (57-60 inches from floor to center)
Once your anchor is up, you’re working with a reference point instead of guessing. Build outward from there, using your floor layout photo as your guide.
Pro tip: If you’re hanging above furniture, leave 6-8 inches between the furniture top and the bottom of your lowest frame.
Use The Right Hardware
Nothing ruins a professional look faster than frames hanging crooked or falling off the wall. Invest in proper hanging hardware.
What you need:
- Picture hanging strips for lightweight frames (under 5 pounds)
- Traditional picture hangers for medium frames
- Wall anchors for heavy pieces or drywall installation
- A level (this is non-negotiable!)
- Measuring tape and pencil
For larger frames, use two hanging points instead of one centered hook. This prevents tilting and keeps everything perfectly straight.

Create Visual Balance With Your Art
Even with perfect spacing and framing, your gallery wall can fall flat if the artwork itself doesn’t flow together.
Balance your collection by mixing:
- Subjects: Abstract art, photography, typography, illustrations
- Colors: Pull 2-3 colors that repeat throughout the pieces
- Styles: Vary between busy patterns and simpler designs
- Orientations: Mix vertical, horizontal, and square frames
The key is variety within cohesion. Your pieces should feel like they belong in the same collection, even if they’re different subjects or styles.
Test Before You Commit
Before you hammer a single nail, do this final check:
- Tape your layout on the wall using painter’s tape to outline each frame
- Live with it for 24 hours
- Look at it in different lighting conditions
- Make adjustments to the tape if needed
This “tape test” catches mistakes before they happen. You might realize your frames are too high, too close together, or that the arrangement feels off-balance. Much easier to adjust tape than to patch nail holes!
The Finishing Touch: Proper Lighting
A professional gallery wall doesn’t stop at the frames. Lighting elevates everything.
Consider adding:
- Picture lights above larger pieces
- Wall sconces flanking the gallery wall
- Strategic placement near a window for natural light
- Adjustable track lighting to highlight the entire arrangement
Proper lighting adds drama, depth, and polish. It’s the difference between “nice” and “wow.”
Ready to transform that blank wall? Start gathering your frames and art pieces, then follow these steps one by one. Remember: even professional designers plan on the floor first! Save this guide for when you’re ready to create your gallery wall—you’ll be amazed at what you can accomplish without hiring anyone. Your walls are about to get a serious upgrade!